1、注册github 官网
2、环境准备
3、ssh设置
1 2 3 4
| $ ssh-keygen -t rsa -C "邮件地址@youremail.com" Generating public/private rsa key pair. Enter file in which to save the key (/Users/your_user_directory/.ssh/id_rsa):<回车就好>
|
1 2
| Enter passphrase (empty for no passphrase):<输入加密串> Enter same passphrase again:<再次输入加密串>
|
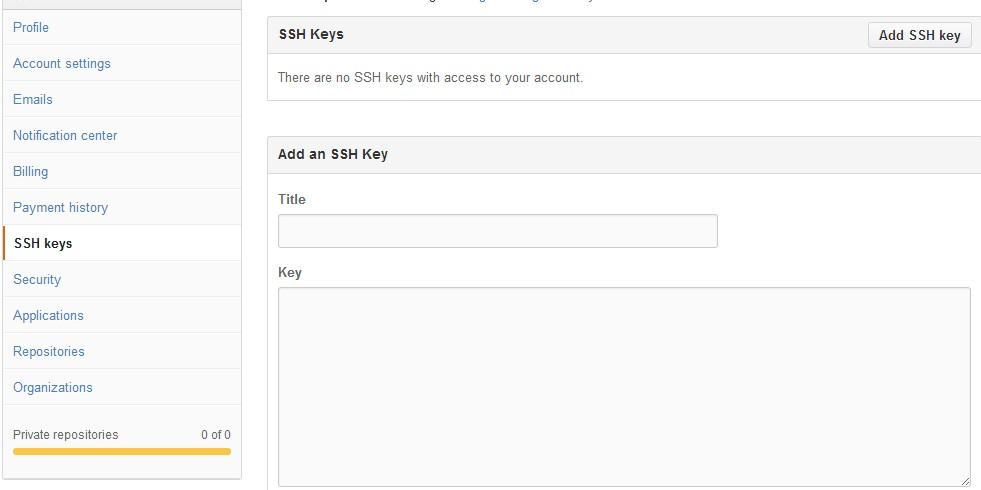
- 有了ssh key之后,添加至github相应的配置中
打开id_rsa.pub拷贝内容,打开github的设置页面添加key粘贴
- 测试是否成功
如果显示如下:
1 2 3
| The authenticity of host 'github.com (207.97.227.239)' can't be established. RSA key fingerprint is Are you sure you want to continue connecting (yes/no)?
|
输入yes
然后会看到:
1
| Hi <em>username</em>! You've successfully authenticated, but GitHub does not provide shell access.
|
至此,已经可以通过ssh连接到github,配置名称和邮箱:
1 2
| $ git config --global user.name "你的名字" $ git config --global user.email "your_email@youremail.com"
|
4、使用github pages建立博客
[官网简易教程](https://pages.github.com/)
5、hexo构建博客
1 2 3 4
| mkdir blog hexo init blog cd blog npm install
|
当修改文章tag或内容,不能正确重新生成内容,可以删除hexo/db.json然后重试,不行就去public下删除对应文件重新生成。
当修改文章tag或内容,不能正确重新生成内容,可以删除hexo/db.json然后重试,不行就去public下删除对应文件重新生成。
1
| hexo new [layout] "new blog"
|
layout的默认值是scaffolds/post.md文件,看下该文件:
1 2 3 4 5 6
| title: date: categories: tags: --- 这里开始使用markdown格式输入正文
|
- 当有任何修改时,只需直接刷新浏览器就可本地预览。
6、hexo和github的关联
打开hexo目录下的_config.yml文件,修改deploy部分:
1 2 3 4 5
| deploy: type: github repo: 对应githubio的地址,建议用https的仓库地址 branch: master message: update
|
配置完之后,每当要发布时只需执行便会自动push到github io的仓库上
如果想要了解更多,可访问 hexo官方文档